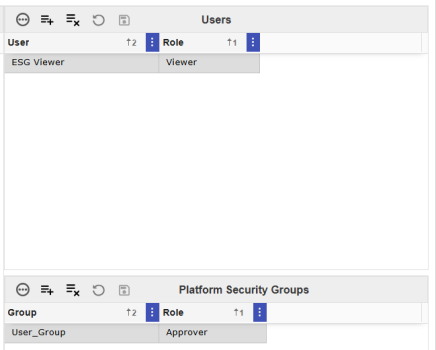
The Access page enables Administrators to manage user roles by creating access groups and access group assignments for users. Users and Platform Security Groups are created in the OneStream System Administration tab. Administrators can leverage existing application security by adding Users and pre-existing Platform Security Groups to access groups on this page. Administrators can also mix and match based on their existing security model.
Manage Access Groups
-
Click the Insert Row button.
-
Enter an access group Name and Description. The Name field is required, and the Name must be unique for the access group to save.

-
Click the Save button.
IMPORTANT: You cannot delete an access group if it is actively assigned to a site. The access group must first be removed from all assigned sites. See Sites.
Manage Users and Platform Security Groups
Users can be assigned to the following roles:
| Role | Description |
|---|---|
| Viewer | Viewers can only view data on the Home page. This role does not have access to the Settings, Administration, and Reports pages. |
| Preparer | Preparers enter data on the Home page. This role does not have access to the Settings, Administration, and Reports pages. |
| Approver | Approvers manage profile statuses. Approvers have access to the Settings, Administration, and Reports pages if they are also a OneStream Administrator or Solution Administrator. |
To add users to an access group, complete the following steps:
-
Select the access group from the Access Group grid to display the User and Platform Security Group grids in the pane.
-
From the Users grid, click the Insert Row button.
-
From the User drop-down menu, select a user from the list.
-
From the Role drop-down menu, select a role for that user.
-
Click the Save button.
-
NOTE: Multiple roles cannot be added to the same user.
To add user groups to an access group, complete the following steps:
-
Select an access group from the Access Group grid to display the User and Platform Security Group grids in the pane.
-
From the Platform Security Groups grid, click the Insert Row button.
-
From the Group drop-down menu, select a group from the list.
-
From the Role drop-down menu, select a role for that user group.
-
Click the Save button.
-
NOTE: Multiple roles cannot be added to the same user group.

 Click the Remove Row button to remove a user or user group.


